

 Once you’ve published, see
Using a distribution in your app for the
client-side code.
Once you’ve published, see
Using a distribution in your app for the
client-side code.
How it works
Three pieces, and it’s worth understanding the split because it’s what makes this both fast and safe:- A distribution is a saved export config. It doesn’t hold any translations — it describes which ones to publish and in what format.
- A release is an immutable snapshot. Every publish renders the current
translations, hashes them, and stores the result. Releases are numbered
(
v1,v2, …) and never change once created. - The manifest is a small JSON document listing every published file with an absolute URL. It’s the only thing that changes when you publish.
- Publishing is cheap. A language whose strings didn’t change keeps the same hash, so it isn’t re-uploaded.
- Your app stays fast. After the first fetch, unchanged files come from the browser or CDN cache without a network round trip.
- Your app survives our outages. The manifest is served with
stale-if-error, so if TextSetu is unreachable your app keeps working from the last manifest it saw for up to 24 hours.
Finding it
Open a project → Manage → Content delivery.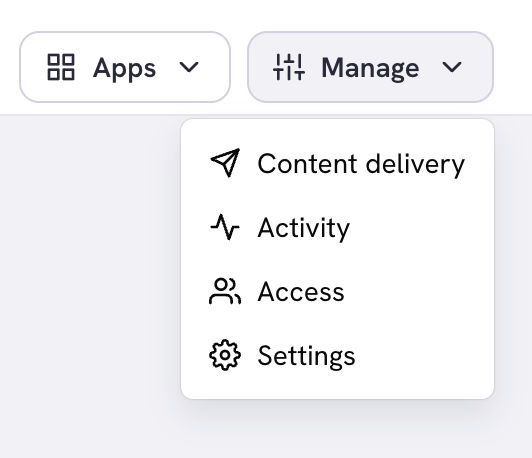 Anyone who can view the project can see this page. Creating, editing and
publishing require Manage project permission — see
Roles & Permissions.
Anyone who can view the project can see this page. Creating, editing and
publishing require Manage project permission — see
Roles & Permissions.
Creating a distribution
Click New distribution.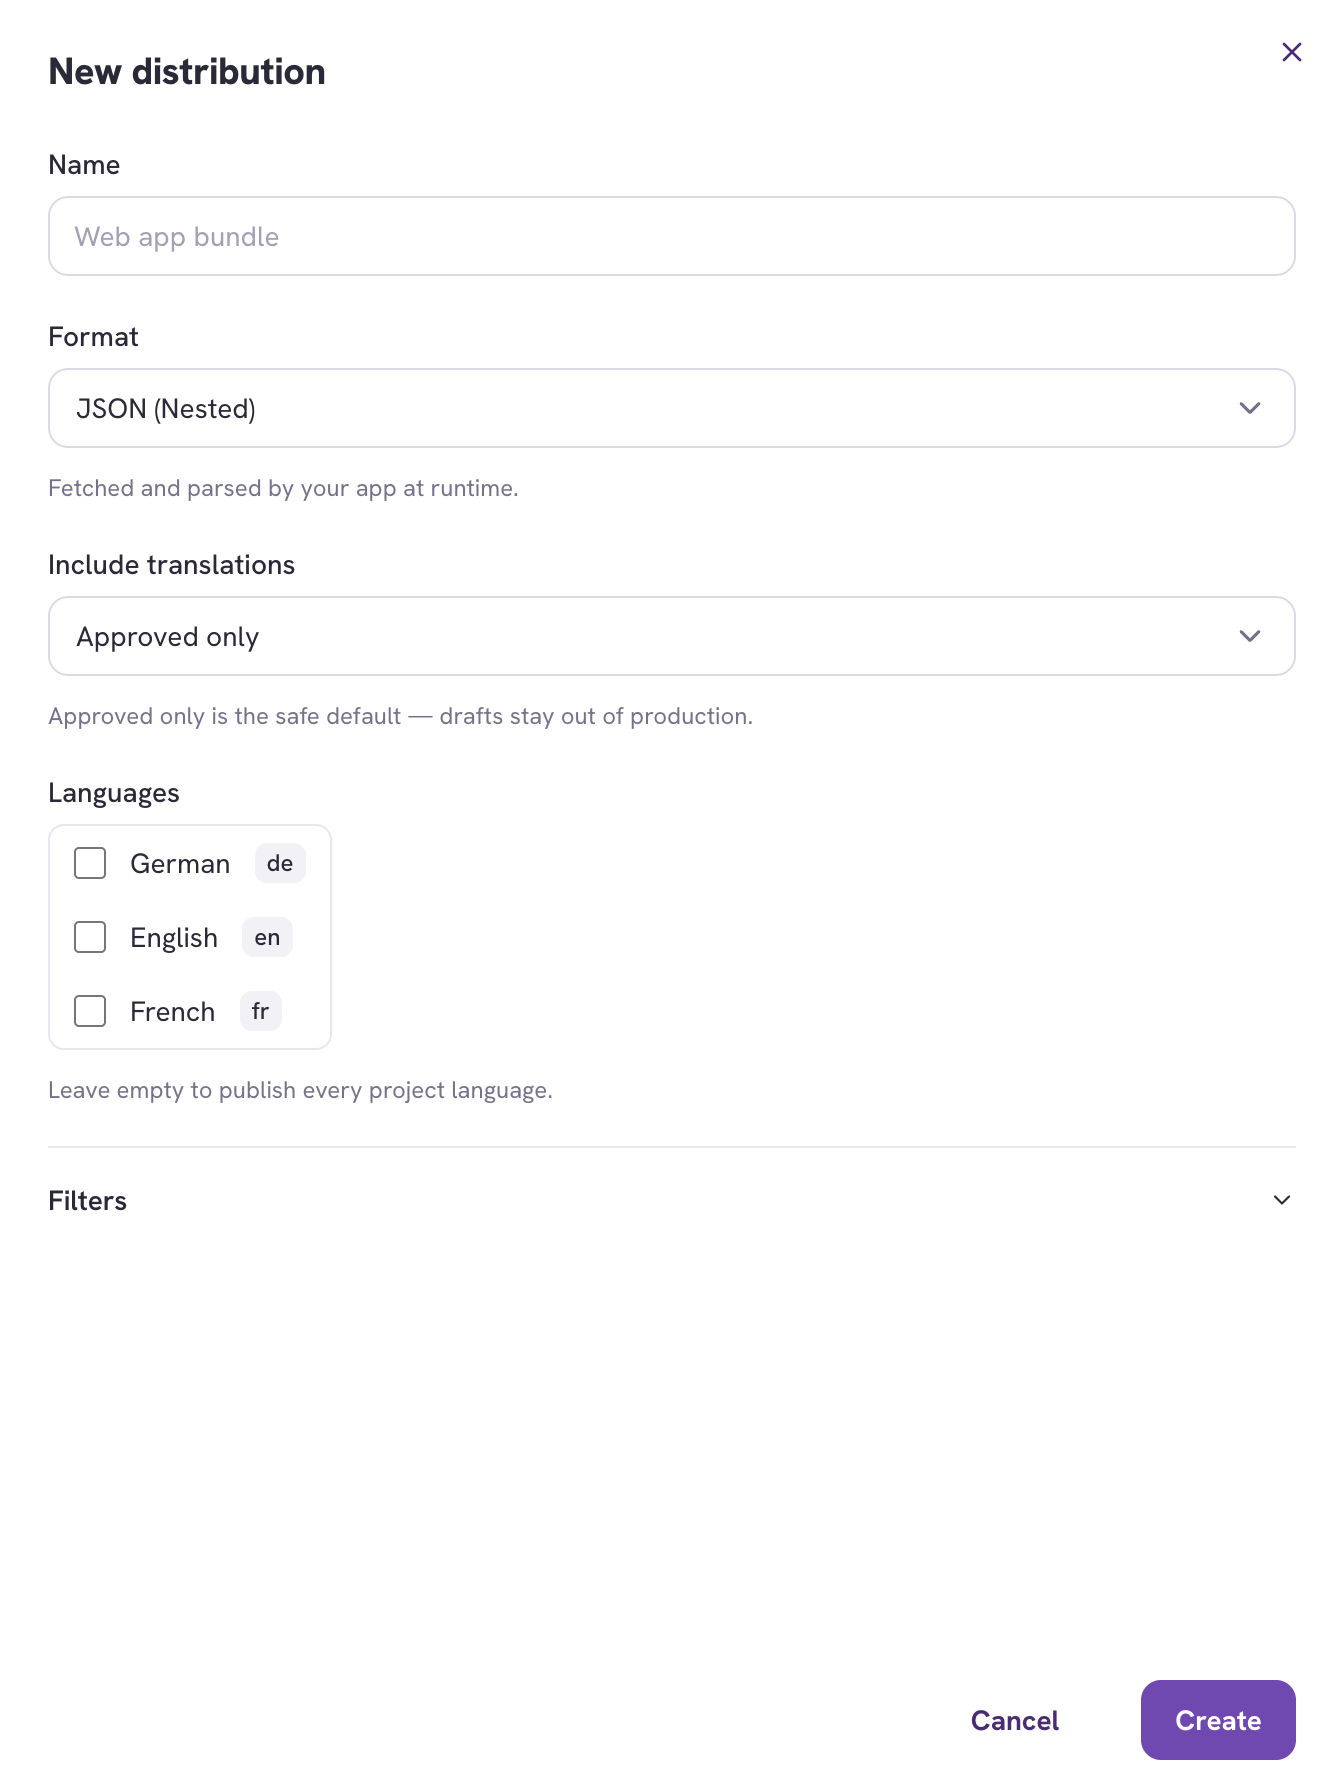
Choosing a format
The picker groups formats by what they’re for, because that determines how your app consumes them:
Every format is publishable — the grouping is guidance, not a restriction.
Publishing XLIFF for a vendor to pull is a perfectly good reason to use this.
The full list is in the
Supported File Formats reference.
Filters
Expand Filters to narrow what gets published.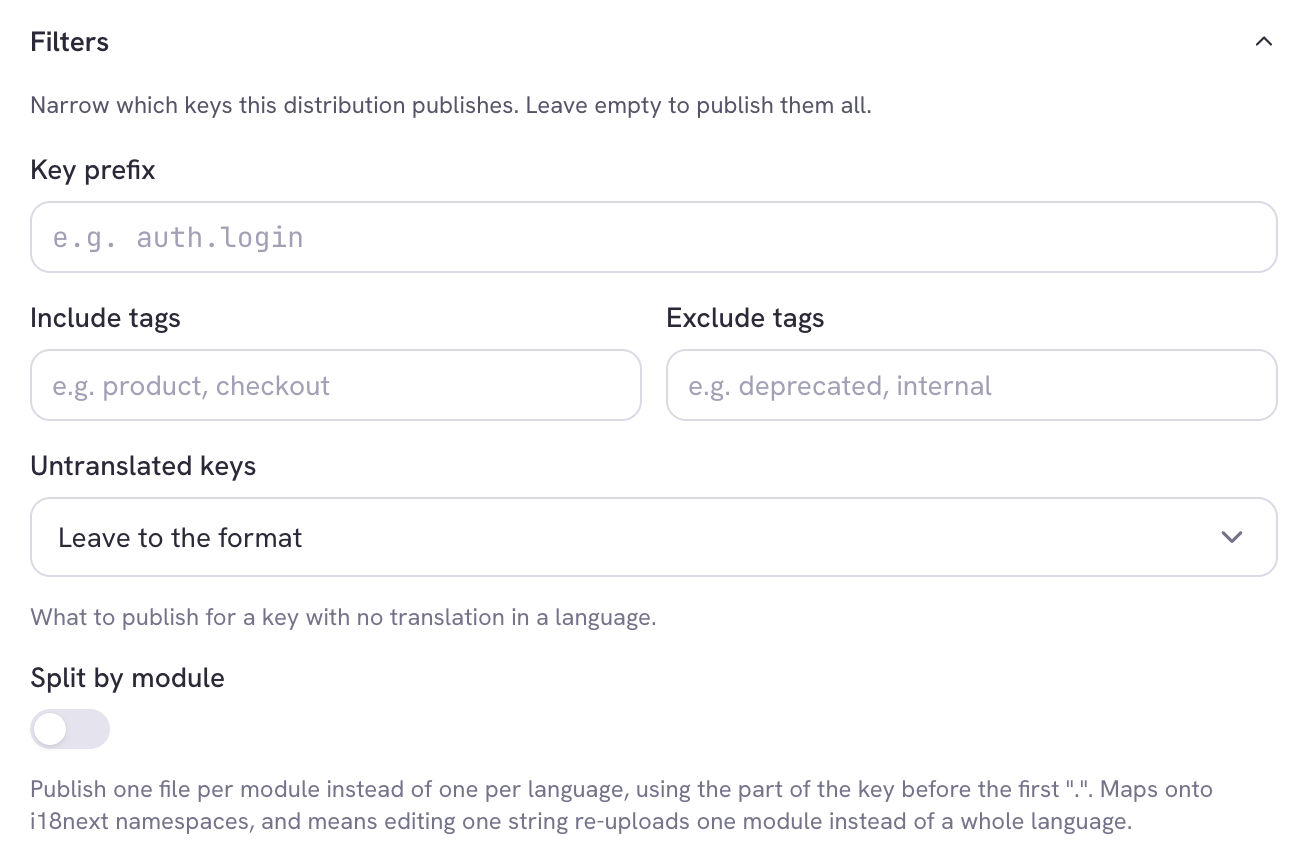
- Key prefix — publish only keys starting with, say,
checkout.. Useful for shipping one area of the product to one surface. - Include tags / Exclude tags — filter by the tags on your keys. Excluding
internalordeprecatedis the common case. - Untranslated keys — what to publish for a key with no translation in a
language:
- Leave to the format (default) — let the file format decide. Key-value formats like JSON simply omit the key; formats with a fixed record shape like XLIFF or Android XML emit an empty value, because the record has to exist.
- Omit the key — drop it entirely, so your app’s own fallback chain takes over instead of rendering a blank.
- Fall back to the source language — publish the source string. Showing English to a French user usually beats showing nothing.
- Split by module — see below.
Split by module
Off by default. When enabled, TextSetu publishes one file per module per language instead of one file per language, where the module is the part of the key before the first separator — socheckout.title and checkout.pay land in
fr/checkout.json.
Two reasons to turn it on:
- Your app loads less per screen. This maps one-to-one onto i18next namespaces, so a checkout page can load only the checkout strings.
- Publishing gets cheaper. Editing one string re-uploads one module’s file rather than the whole language — which matters most with auto-publish on.
checkout.cart.title into module checkout; depth 2 into
checkout.cart.
Starting from an export
If you’ve already configured an export — format, languages, filters — you don’t need to retype it. On the Export page, under the summary, choose Publish this continuously.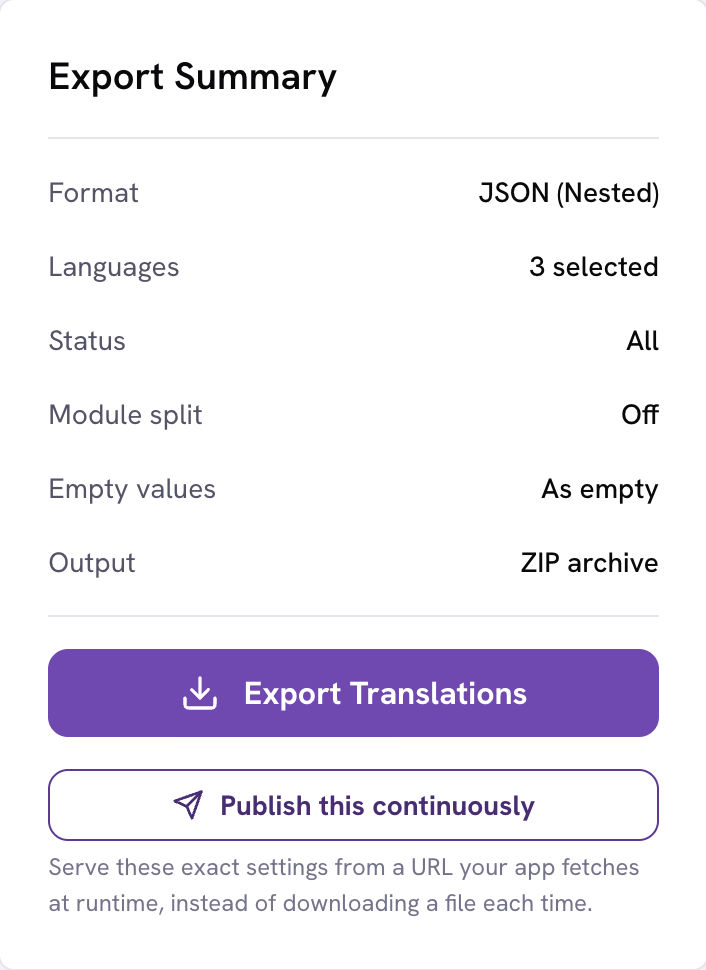 The distribution drawer opens prefilled with those settings. Nothing is
published until you name it and click Create.
A few export options have no continuous equivalent and are listed in the drawer
rather than silently dropped:
The distribution drawer opens prefilled with those settings. Nothing is
published until you name it and click Create.
A few export options have no continuous equivalent and are listed in the drawer
rather than silently dropped:
- Key order and descriptions — presentation choices for a one-off file.
- Branch — a distribution always publishes from the main branch. Pinning a public URL to a feature branch is almost never what you want.
- Some status filters — “untranslated” and “translated” describe per-key coverage rather than an approval state.
Publishing
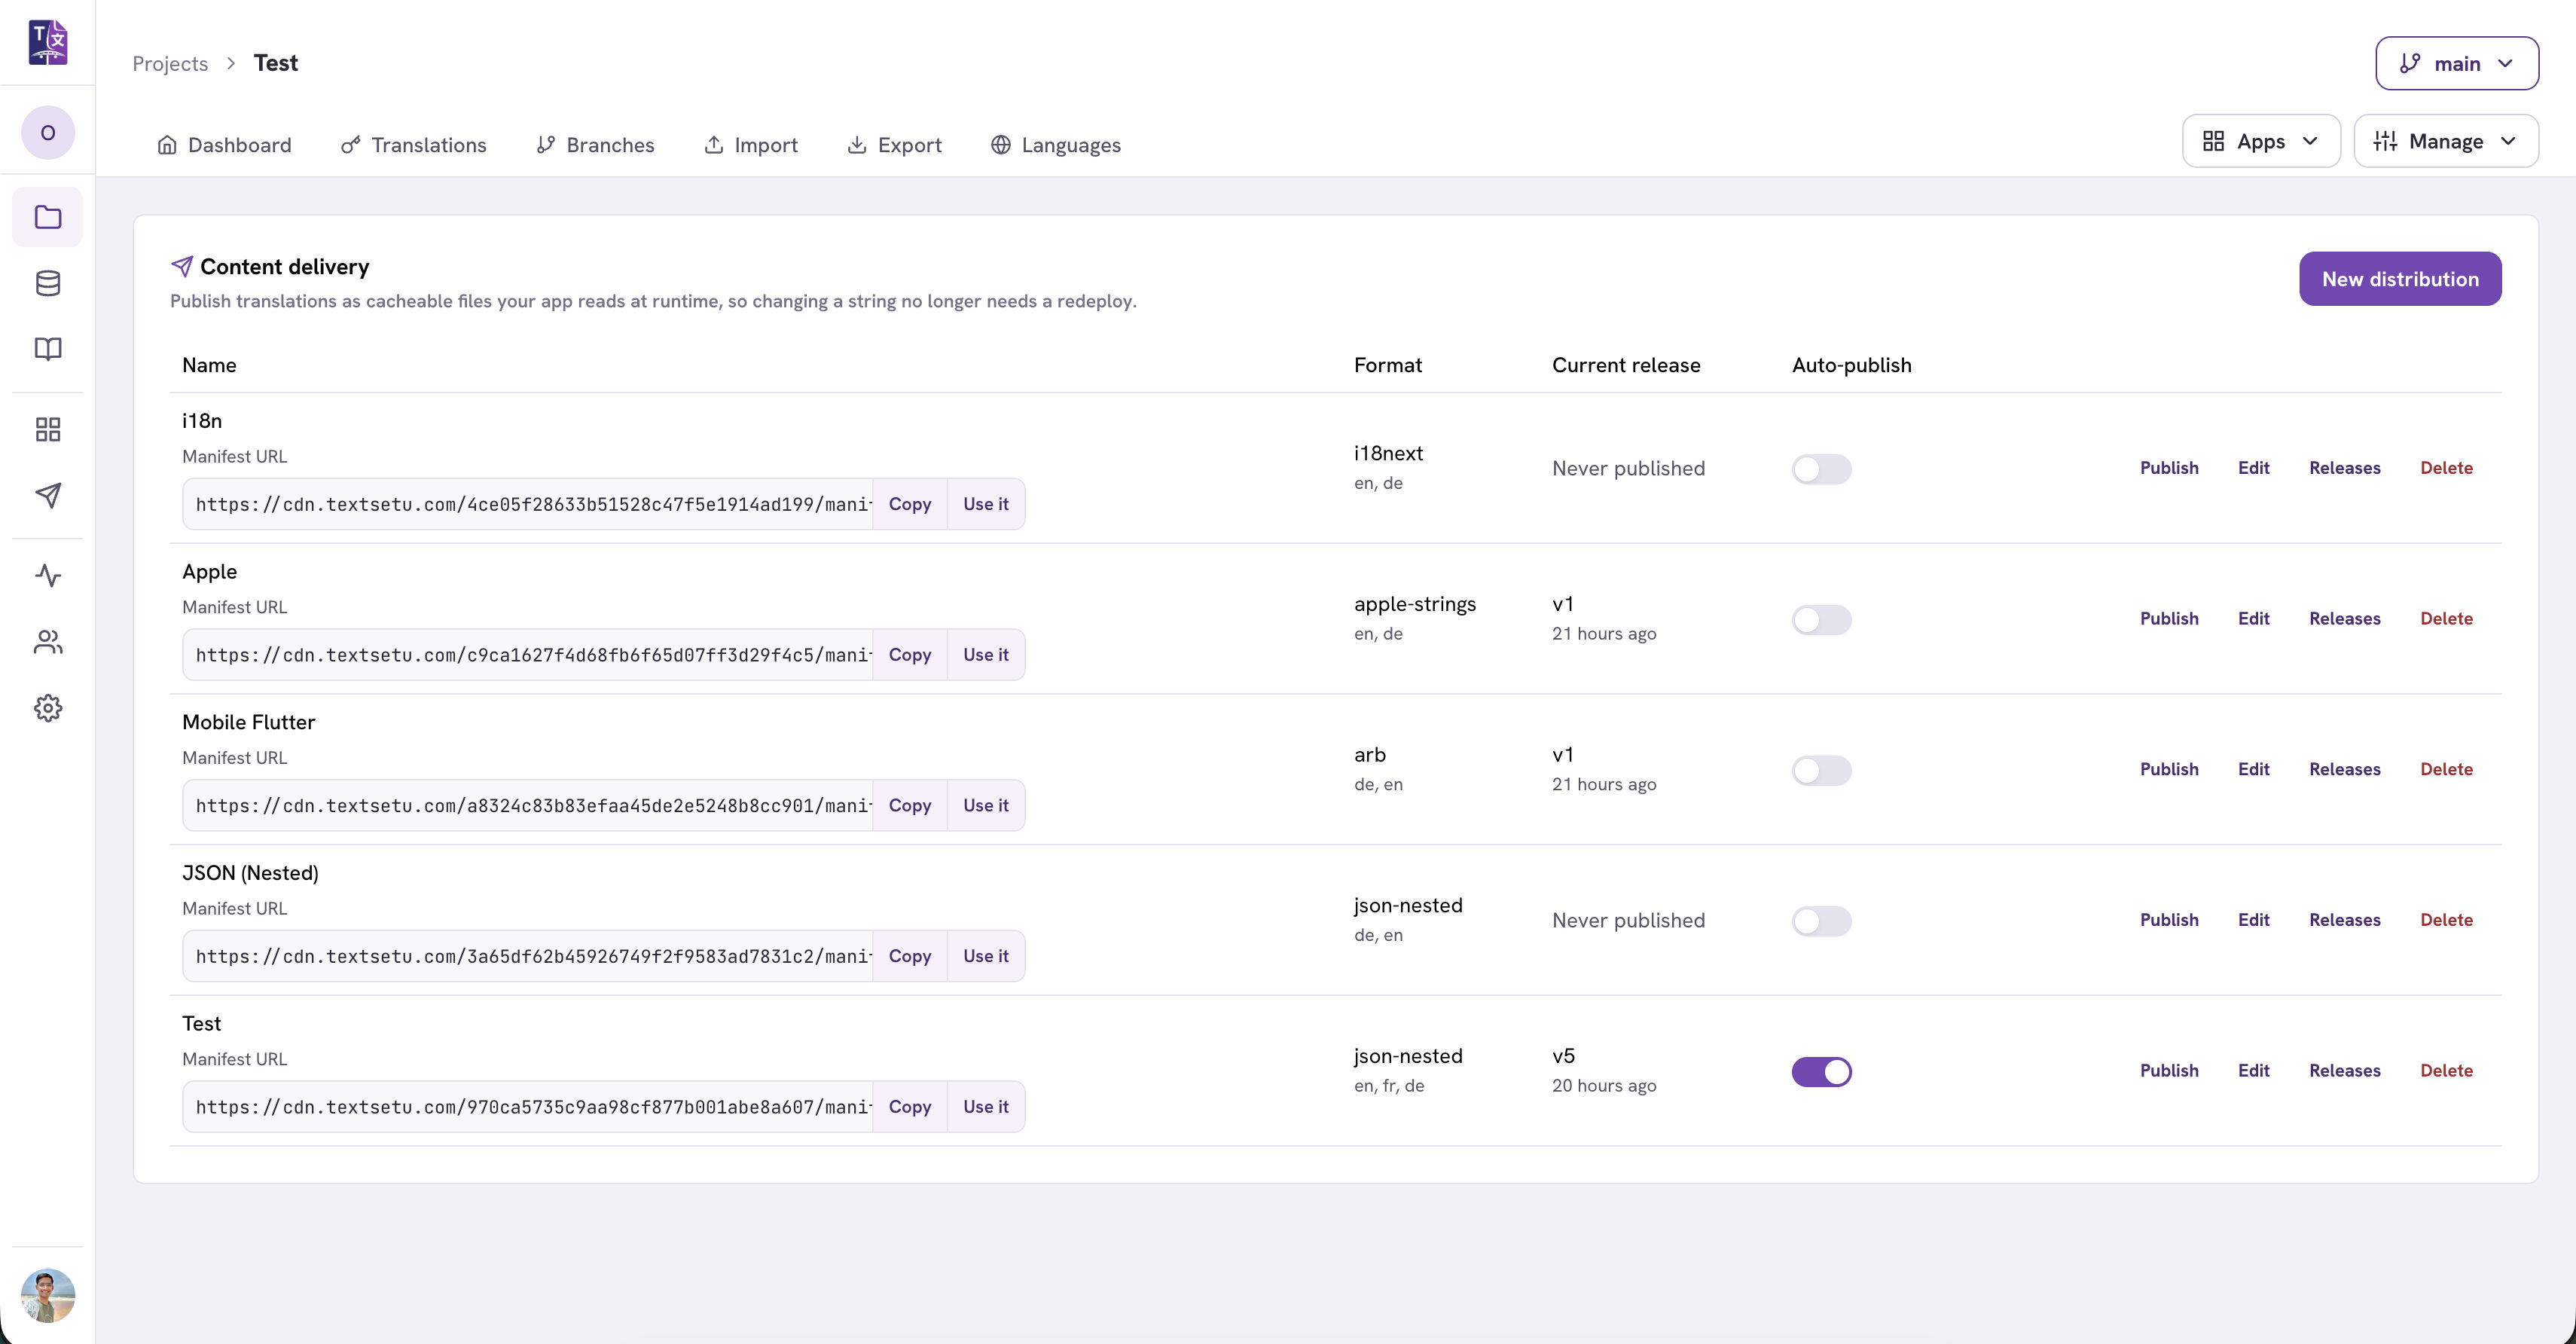
Press Publish on the distribution’s row. The build runs in the background; the row updates when it lands. Three outcomes:- A new version —
v3, say. The manifest now points at it. - “Already up to date” — the rendered content was byte-identical to the current release, so no release was created. This is a success, not a no-op error. It’s also why auto-publish is affordable: an edit your filters exclude costs nothing.
- A failure — the row shows the error. The previously published release keeps serving; a failed publish never takes your app offline.
The manifest URL
Each distribution has one permanent manifest URL, shown in the list with a Copy button. It survives publishes, rollbacks and format changes — that’s the whole point. Paste it into your app once. Use it opens ready-made code for your distribution’s format, generated against your real manifest URL. If a URL does leak, it can be rotated: every stored file moves to a new address, the manifests are rewritten, and the old objects are deleted, so the leaked URL stops working. This isn’t a button in the UI yet — ask your administrator to run it. Your app then needs the new URL, so plan the change alongside a release. The self-serve alternative is to delete the distribution and create a new one, which mints a fresh URL immediately. You lose the release history, so prefer rotation where the history matters.Auto-publish
Toggle Auto-publish on a distribution and it republishes itself whenever the translations behind it change — approvals, edits, imports, new keys, branch merges. Changes are debounced (60 seconds by default), so importing 5,000 strings triggers one publish, not 5,000. Editing the distribution’s own settings also arms it, so a format or filter change goes live on its own. There’s a ceiling of 20 automatic publishes per distribution per hour. Hitting it means something is churning; the skip is logged rather than silent.Editing a distribution
Edit reopens the drawer with everything editable — format, languages, filters, module splitting, provider. Changing something that affects the output doesn’t republish on its own. The live release keeps serving the old settings until the next publish, and TextSetu says so when you save. If auto-publish is on, it picks the change up on its own debounce.Releases and rollback
Releases opens the history: every version with its size, file count, when it was published, and whether the CDN cache was cleared. Roll back to this re-points the manifest at an earlier release. It’s a pointer swap, not a rebuild — the files are still stored, so it takes effect within the manifest’s 60-second cache and needs no change in your app. That makes rollback the right first move when a bad string reaches production: roll back, then fix the translation properly.Release retention
Old releases are cleaned up automatically. By default the most recent 10 per distribution are kept in full; your organization’s plan may allow more. The current and previous releases are always kept regardless, so one-click rollback never breaks.”History only” releases
Past that limit, a release isn’t deleted — it’s tombstoned. The row stays in your history with its version, content hash, size and author, so “what did we ship in v11” remains answerable. What’s removed is the published files. A tombstoned release is badged History only and has no rollback button, because there is nothing left to serve. What this means in practice: your rollback window is the retention limit. If you need to roll back further than that, publish the older content again rather than rolling back to it. If your team needs a longer window, ask your administrator — the limit is set per organization.Usage
Delivery usage in the main sidebar reports requests, bandwidth, publishes and cache hit rate. It’s organization-wide — every project’s distributions in one view — and needs organization read access.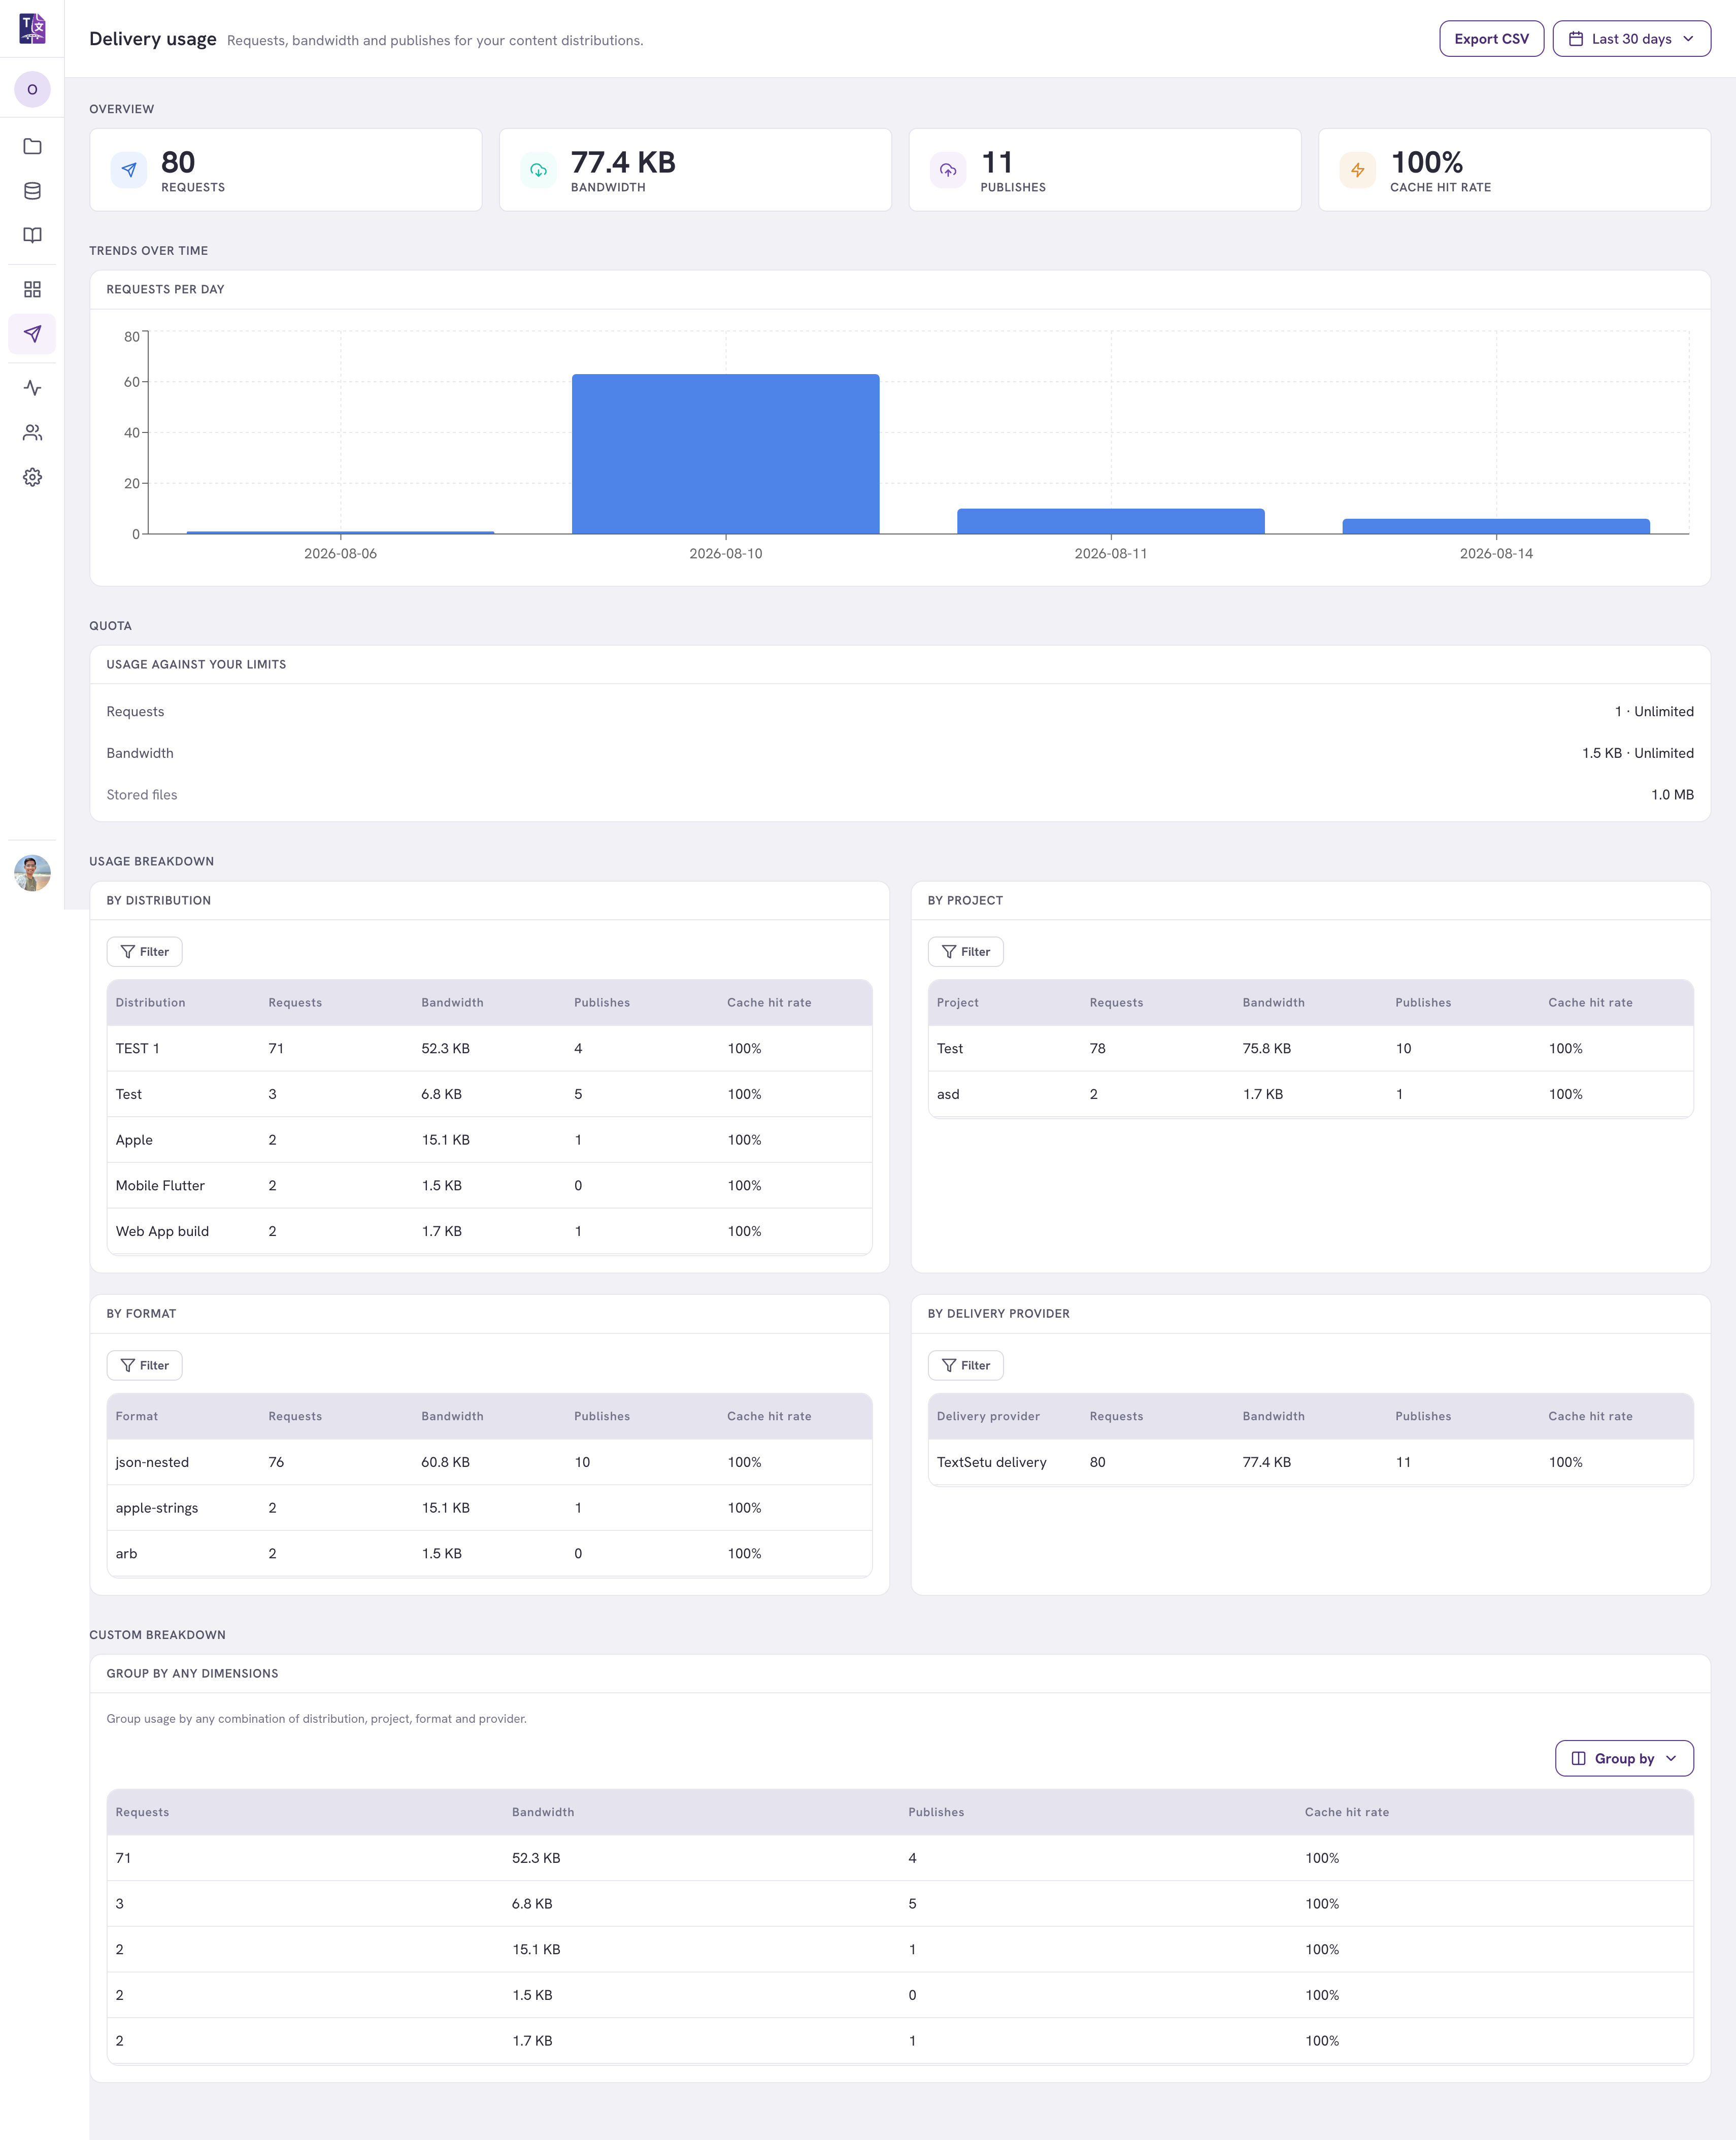
- Overview — totals for the selected window.
- Requests per day — the traffic trend.
- Usage against your limits — where you are against your plan’s quota. “Unlimited” means no cap is set.
- Breakdowns — by distribution, project, format and delivery provider, plus a custom breakdown you can group by any combination of those.
- Export CSV exports the full selected range, not just the visible page.
Publishing to your own storage and CDN
Every project publishes through TextSetu’s CDN out of the box, with nothing to configure. Adding your own provider is optional — do it only if you want the files on storage and a CDN you control. Good reasons to: you already have a CDN and want one cache and one bill; you need the files inside your own network or region; or your compliance rules require it. Set it up at Organization settings → Content delivery. It’s org-level, so every project can use it.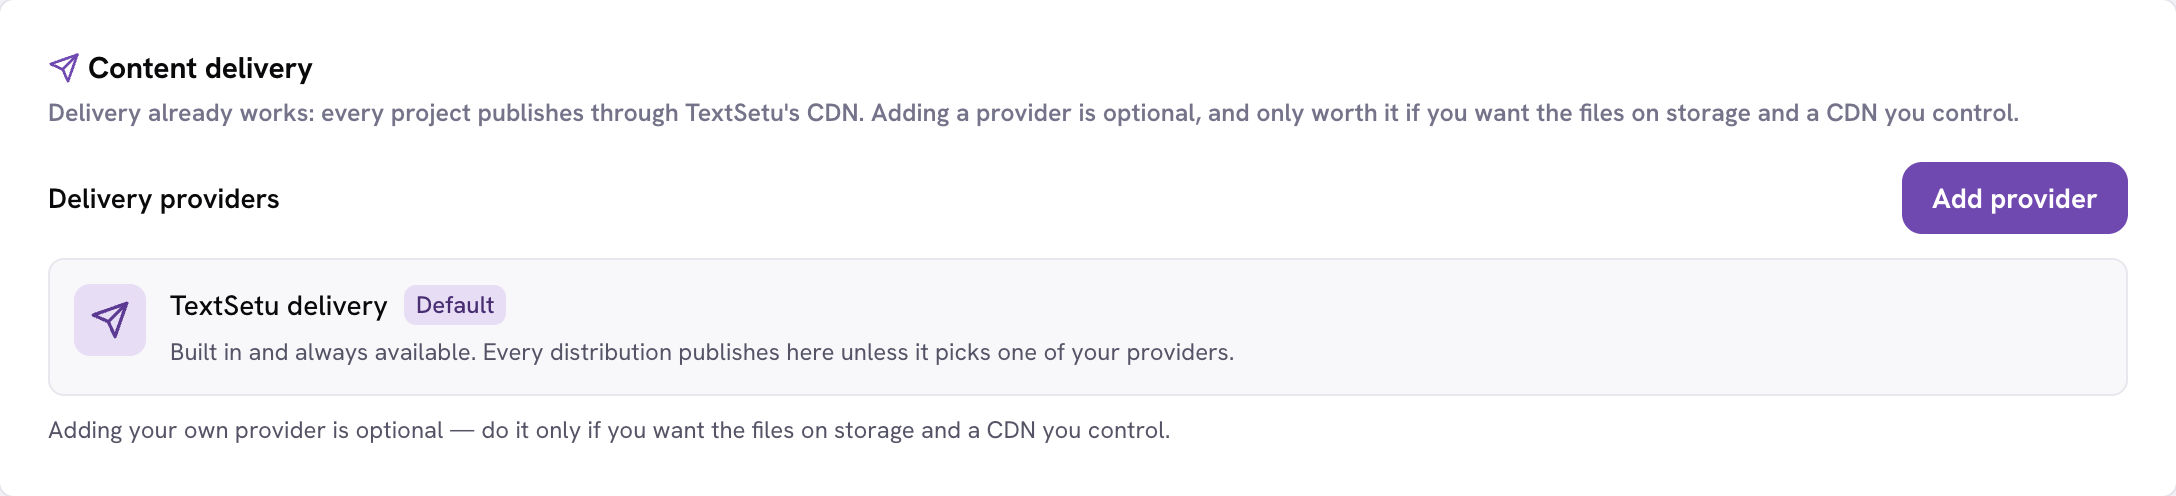 Adding a provider requires Manage organization permission.
Step 1 — Choose a provider
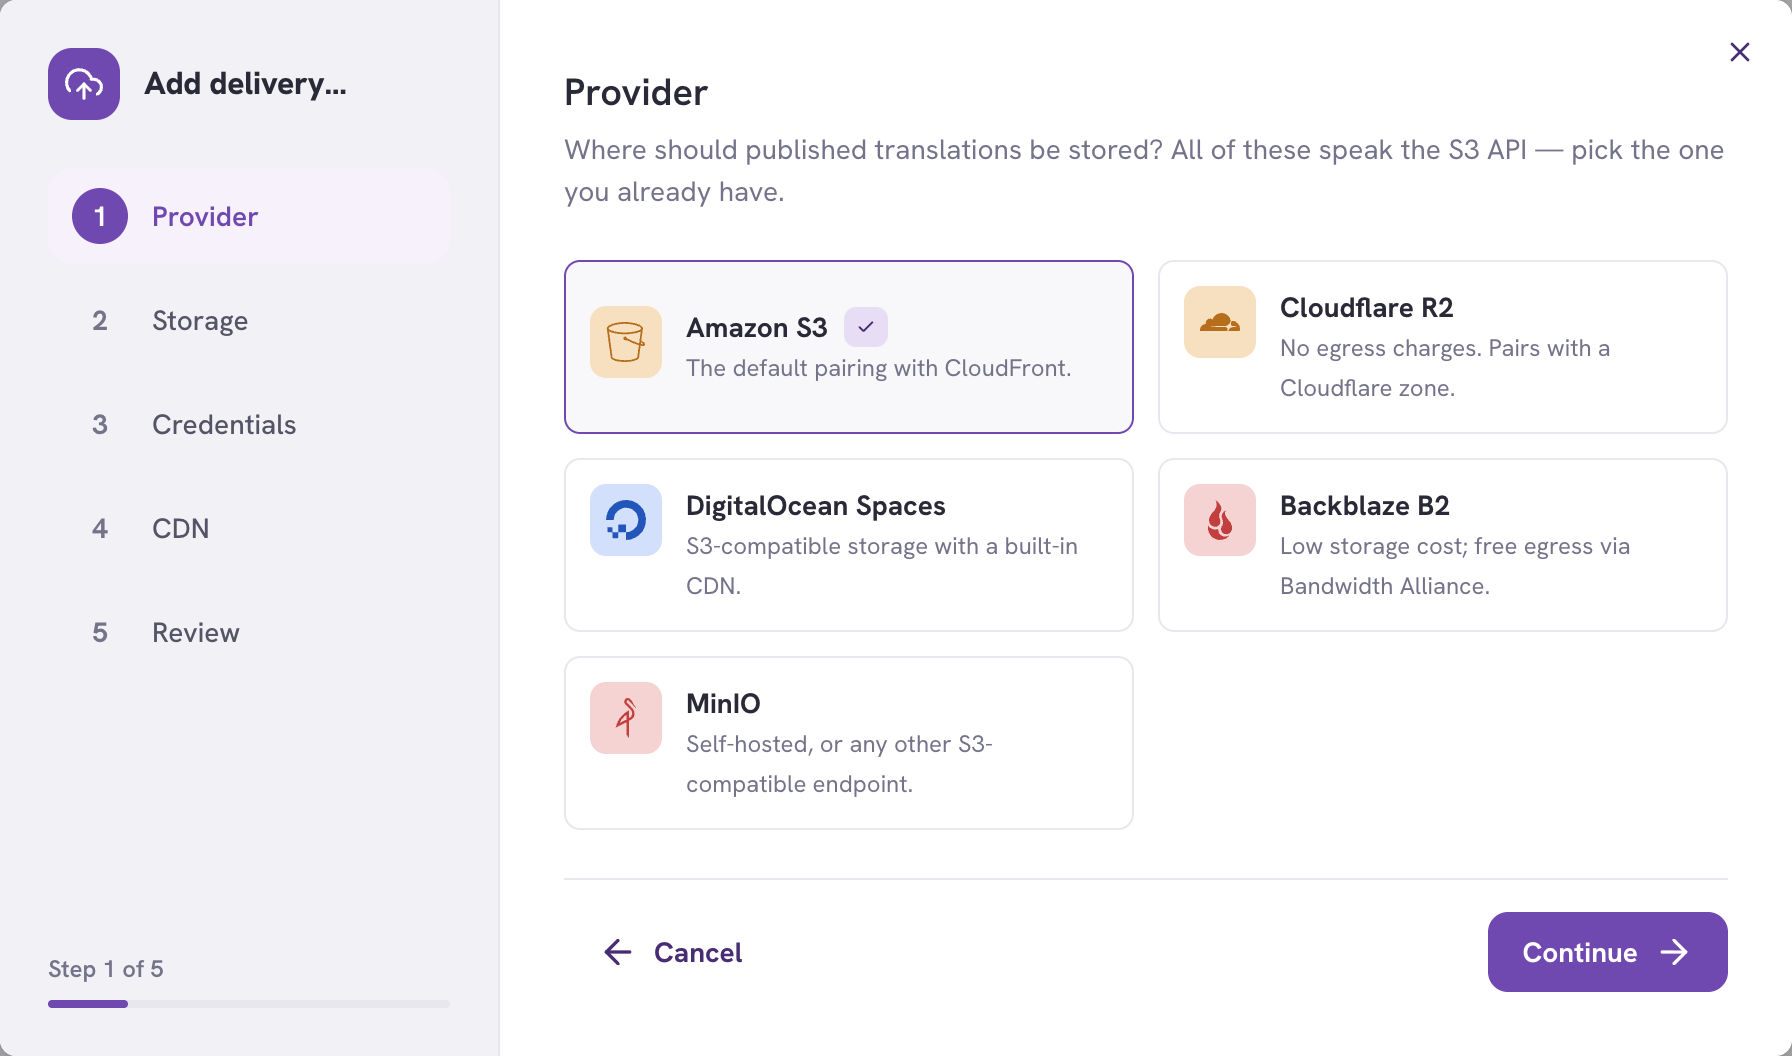 All five speak the S3 API — pick the one you already have.
Step 2 — Storage
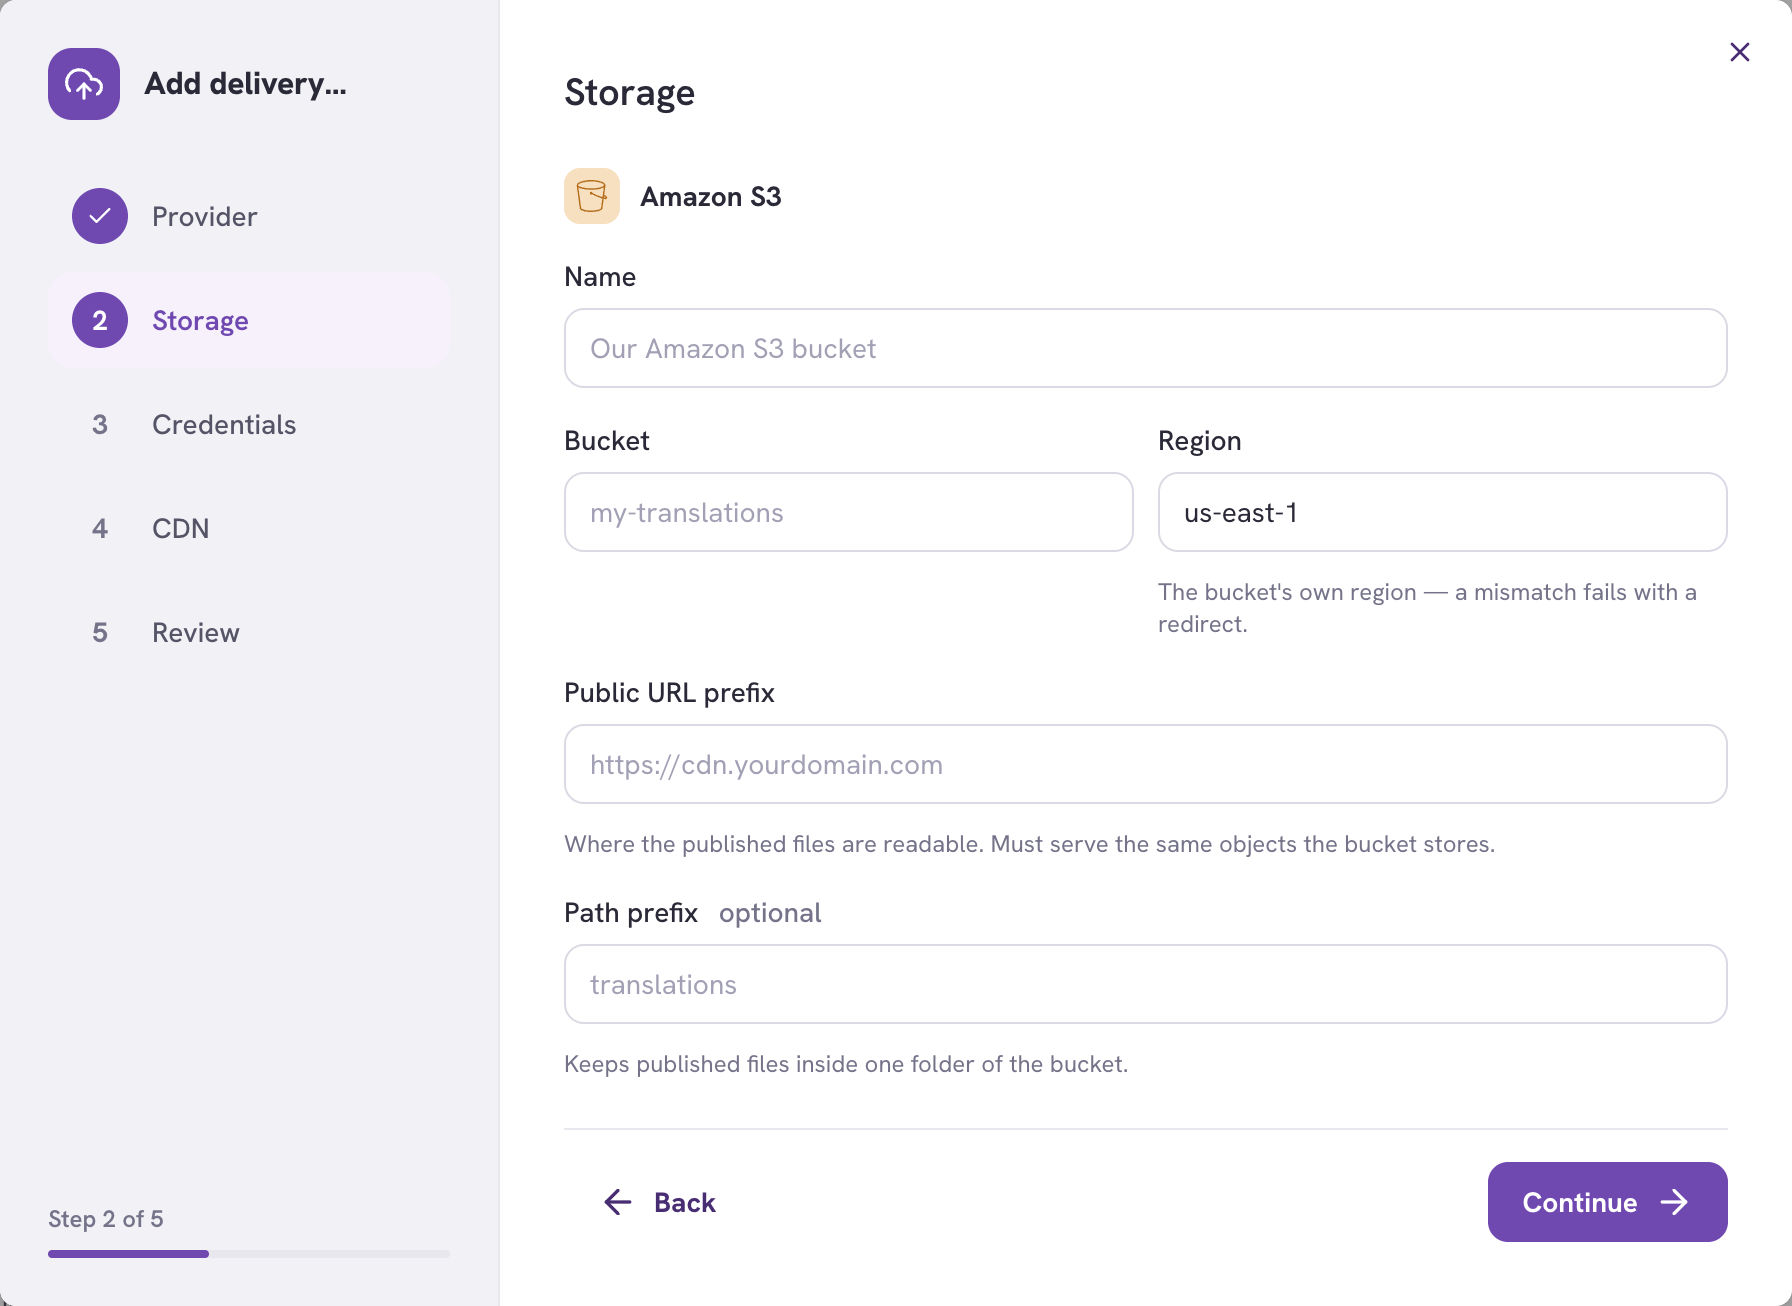
- Bucket and Region — the region must be the bucket’s own; a mismatch fails with a redirect.
- Public URL prefix — where the published files are readable from. This is your CDN’s domain if you have one in front, or the bucket’s public URL if not. It must serve the same objects the bucket stores.
- Path prefix (optional) — keeps published files inside one folder, so you can share a bucket with other content.
Step 3 — Credentials
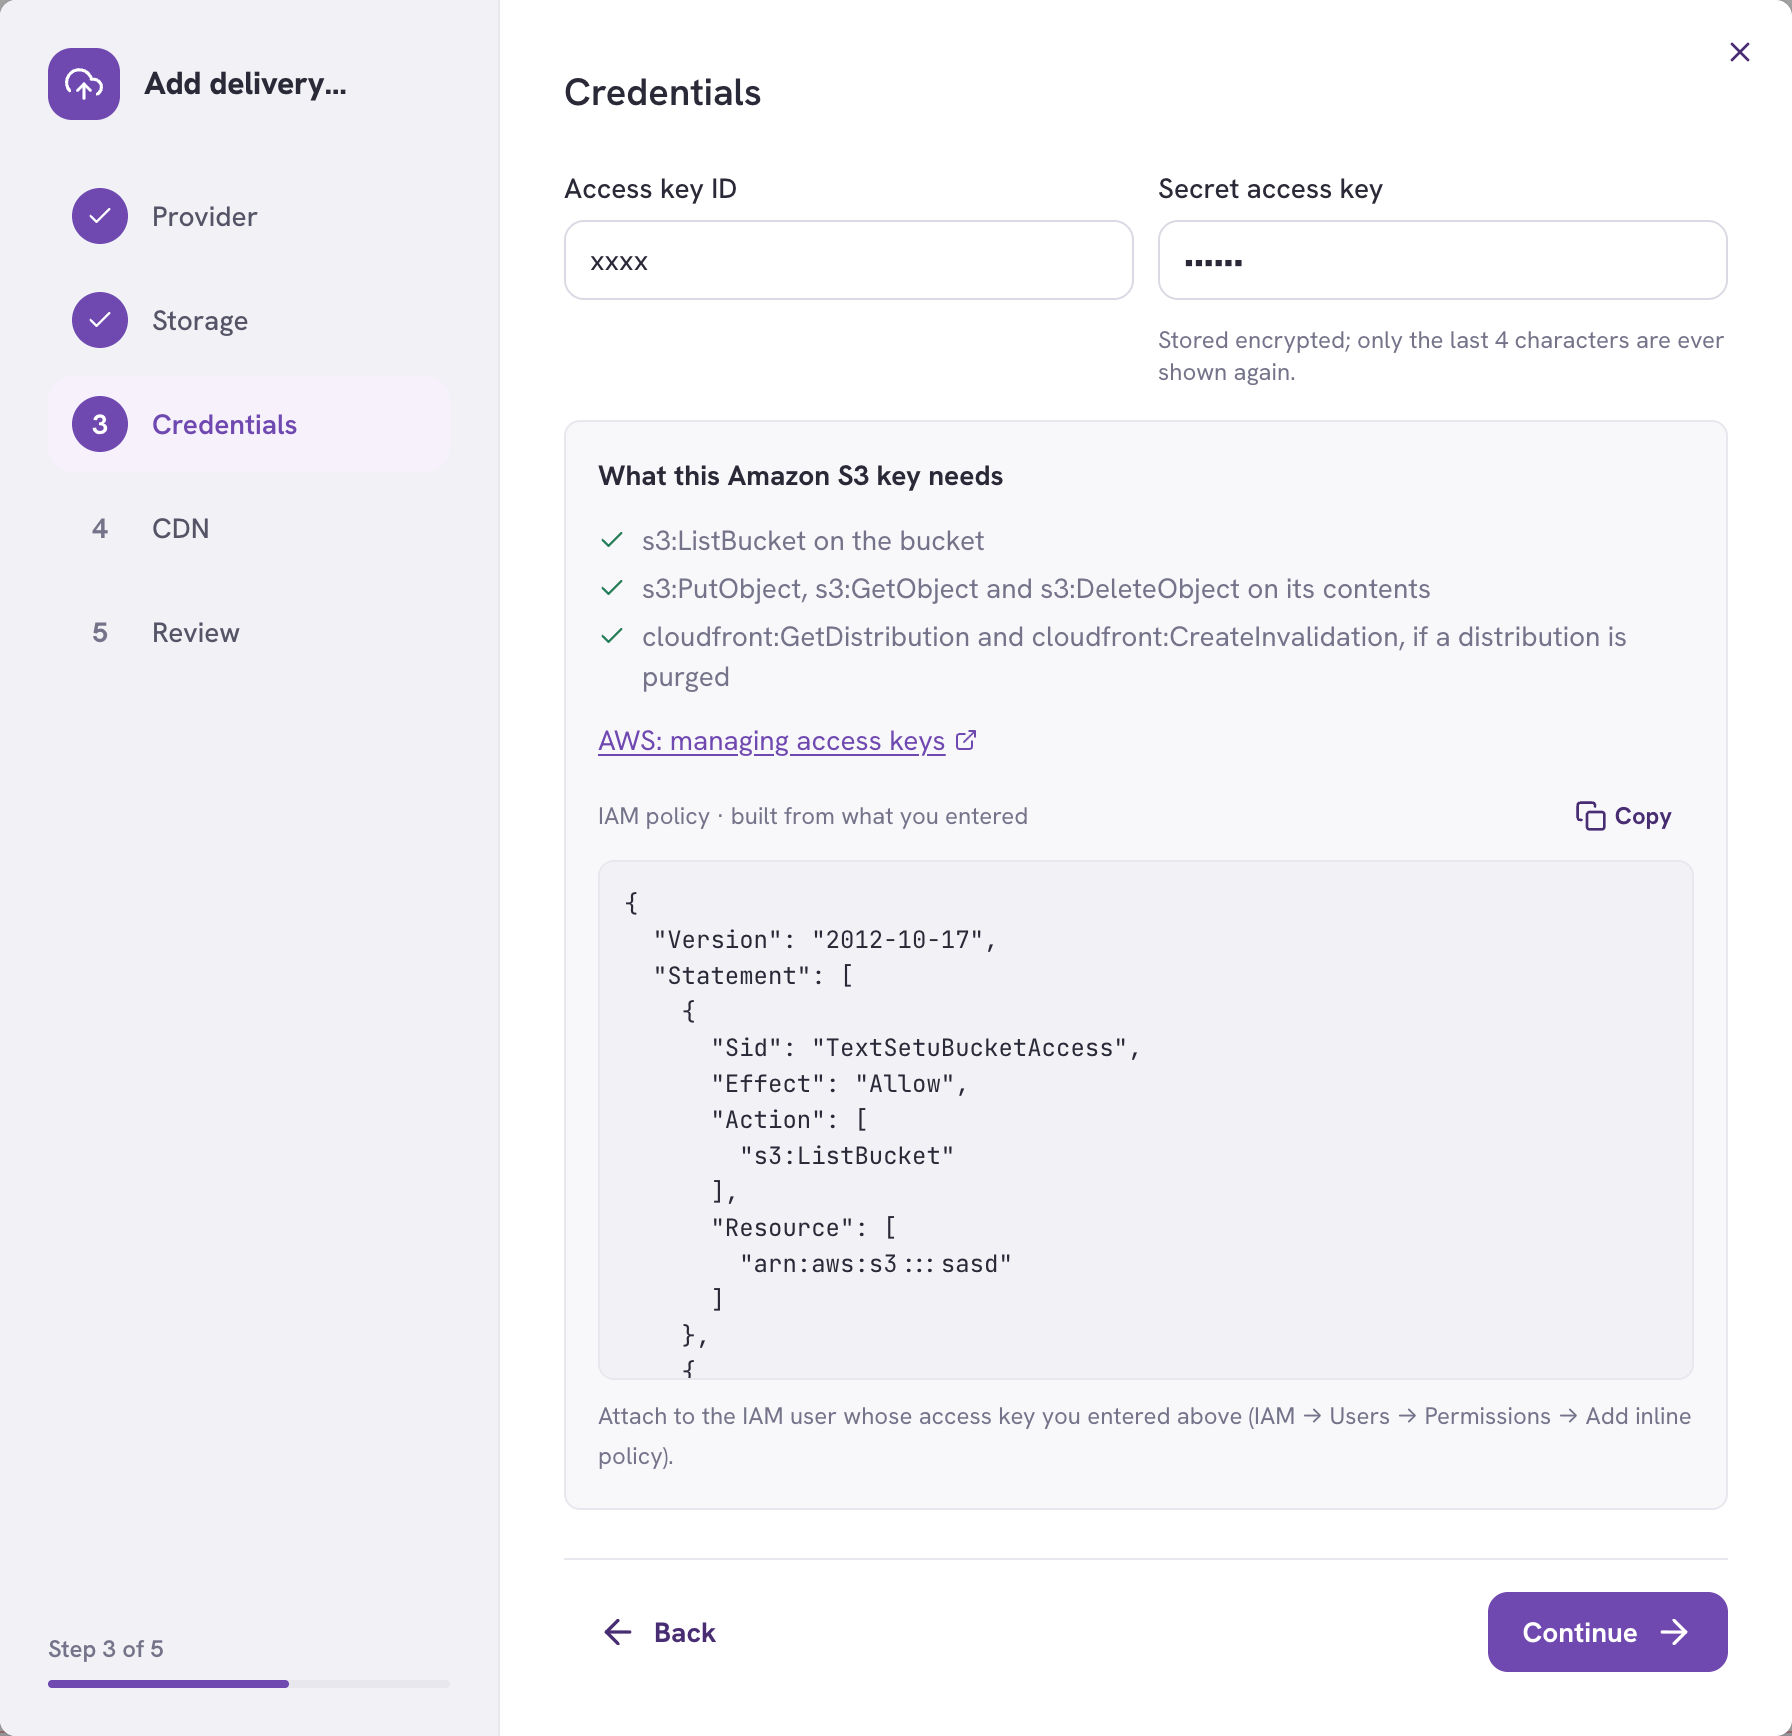 Secrets are stored encrypted and only their last four characters are ever shown
again.
TextSetu generates the exact IAM policy from what you entered — copy it and
attach it to the key’s user. It grants precisely what publishing needs:
Secrets are stored encrypted and only their last four characters are ever shown
again.
TextSetu generates the exact IAM policy from what you entered — copy it and
attach it to the key’s user. It grants precisely what publishing needs:
s3:ListBucketon the buckets3:PutObject,s3:GetObjectands3:DeleteObjecton its contentscloudfront:GetDistributionandcloudfront:CreateInvalidation, if you’re purging a distribution
Step 4 — CDN (optional)
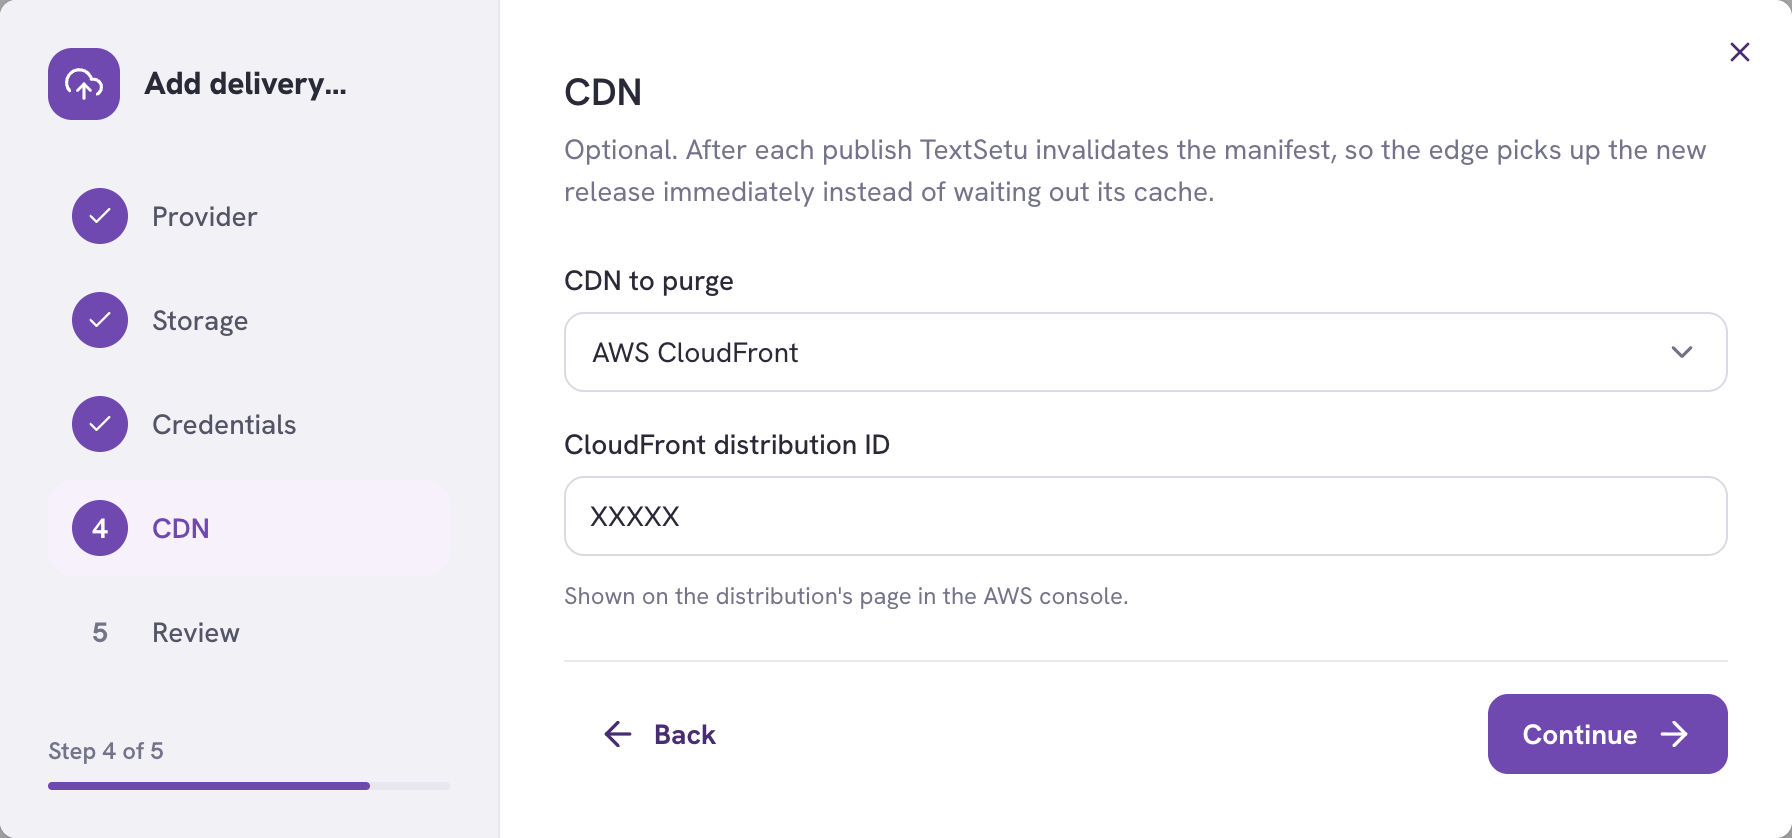 After each publish TextSetu invalidates the manifest, so the edge picks up the
new release immediately instead of waiting out its cache. Only the manifest is
invalidated — the files are content-addressed, so a changed file is a different
URL and there’s nothing to purge.
After each publish TextSetu invalidates the manifest, so the edge picks up the
new release immediately instead of waiting out its cache. Only the manifest is
invalidated — the files are content-addressed, so a changed file is a different
URL and there’s nothing to purge.
- AWS CloudFront — needs the distribution ID from its page in the AWS console.
- Cloudflare — needs the zone ID and an API token with the Zone → Cache Purge permission.
Step 5 — Review
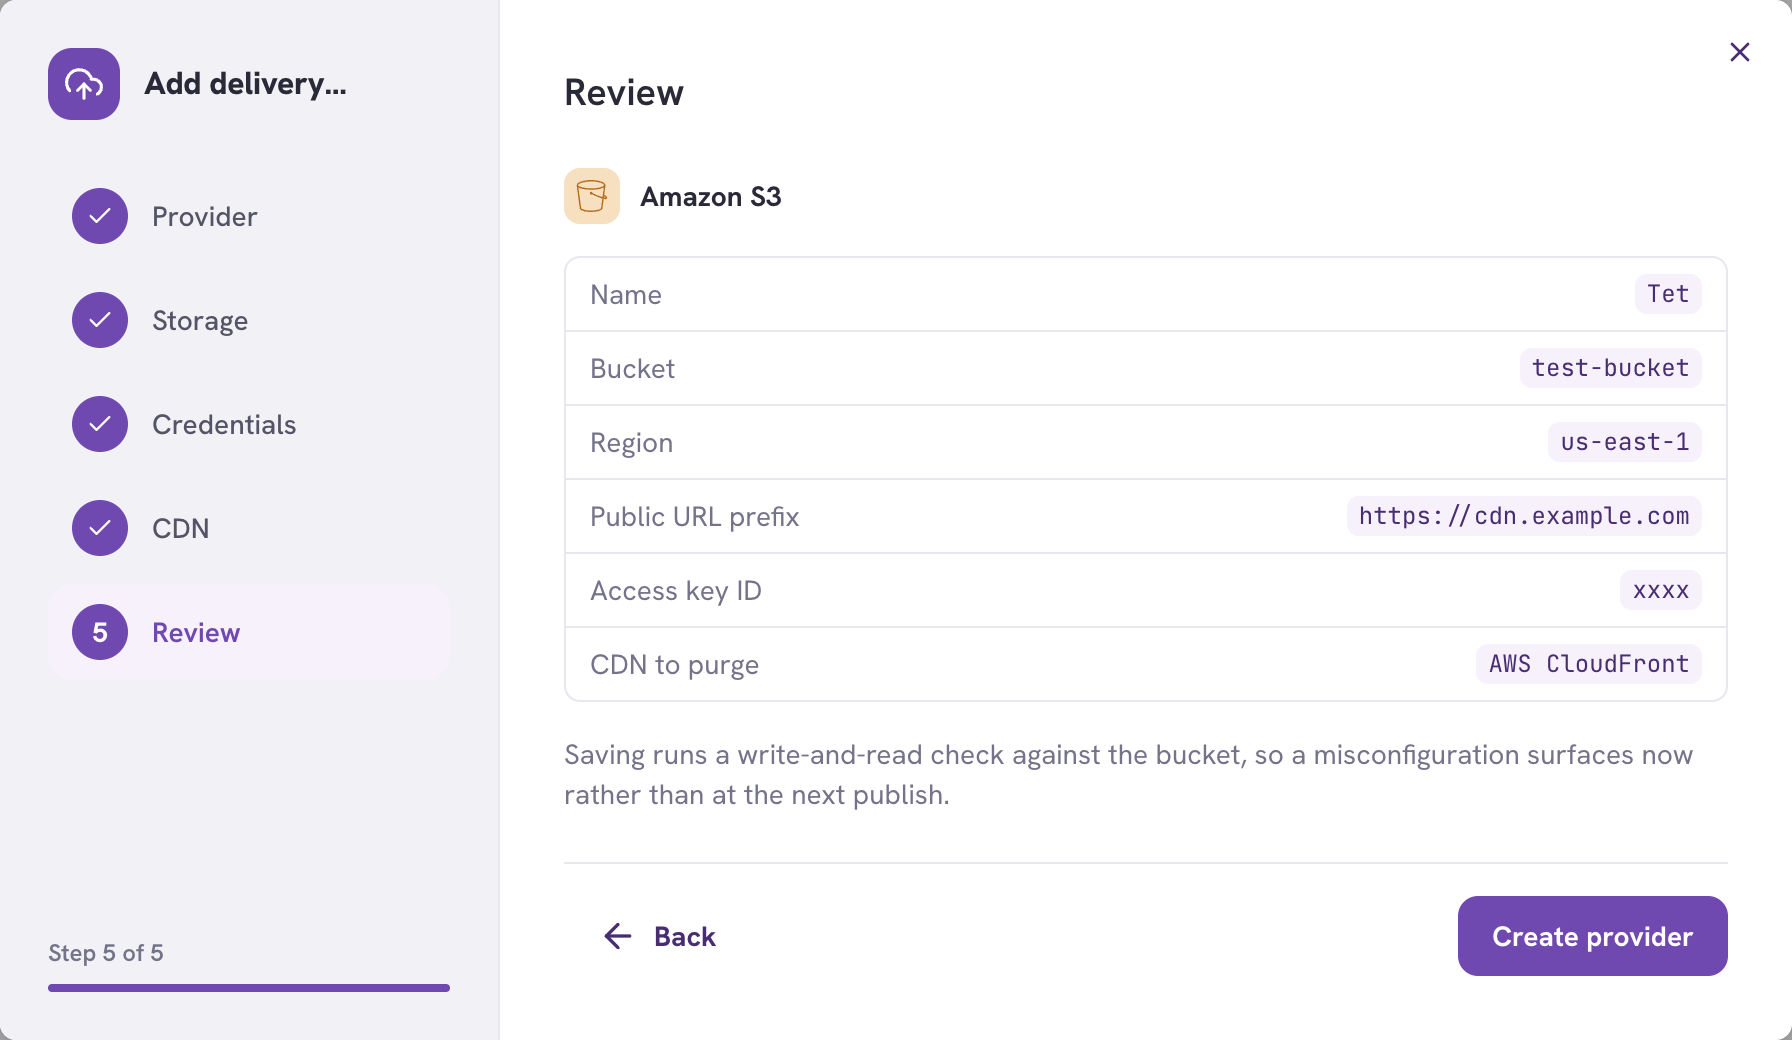 Saving runs a real write-and-read check against the bucket, so a
misconfiguration surfaces now rather than at your next publish.
Saving runs a real write-and-read check against the bucket, so a
misconfiguration surfaces now rather than at your next publish.
Using it
Once a provider exists, pick it in a distribution’s Publish to field. Leave it as TextSetu delivery and nothing changes. Verify re-runs the storage check at any time. The provider also shows a warning when cache invalidation is failing
repeatedly. That’s tracked separately from Verify on purpose: a provider can
verify perfectly — the bucket credentials are fine — while every invalidation
fails because a CloudFront permission expired. Collapsing the two would hide
exactly that.
A provider can’t be deleted while distributions still publish to it. Repoint
those distributions first.
The provider also shows a warning when cache invalidation is failing
repeatedly. That’s tracked separately from Verify on purpose: a provider can
verify perfectly — the bucket credentials are fine — while every invalidation
fails because a CloudFront permission expired. Collapsing the two would hide
exactly that.
A provider can’t be deleted while distributions still publish to it. Repoint
those distributions first.
Getting notified
Subscribe to these webhook events to react to a publish without polling:
Typical use: warm a cache, or tell long-running clients to re-read the manifest.
Troubleshooting
Related
- Using a distribution in your app — client code for every format
- Content delivery manifest — the manifest schema and cache contract
- Import & Export — one-off files instead of continuous publishing
- Webhooks — react to a publish
- Approval workflow — control what reaches production